Why it is important to change the capacitors in an Amiga
As much as I love the timeless design of the newer Amigas (600 onwards) they have a major flaw that can affect their performance and longevity: SMD capacitors. Capacitors are electronic components that store and release electric charge. They are essential for regulating the voltage and filtering the noise in the power supply and other circuits of the computer. Capacitors are made of various materials, such as ceramic, tantalum, or electrolytic.
The problem with some of the Amiga models is that they use SMD electrolytic capacitors, which are prone to leakage and failure over time. Electrolytic capacitors consist of a metal foil, an electrolyte, and a paper separator. The electrolyte is a liquid or gel that can dry out, evaporate, or leak through the seals of the capacitor. When this happens, the capacitor loses its capacitance, which means it cannot store and release charge properly. This can cause instability, noise, distortion, or even damage to the computer.
The symptoms of capacitor leakage or failure can vary depending on the location and function of the capacitor. Some common signs are:
- Audio problems, such as crackling, hissing, or no sound at all.
- Video problems, such as flickering, ghosting, or no picture at all.
- Power problems, such as difficulty in turning on or off, or random resets or crashes.
- Disk problems, such as errors, corruption, or no access to the floppy drive.
- Keyboard problems, such as keys not working or typing wrong characters.
- Mouse problems, such as erratic movement or no response.
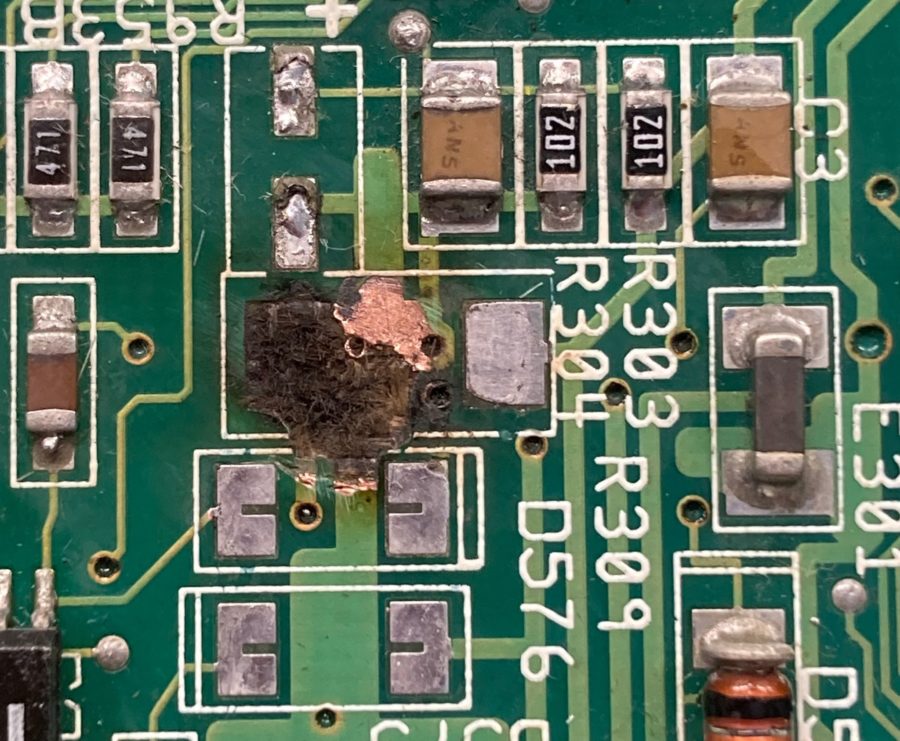
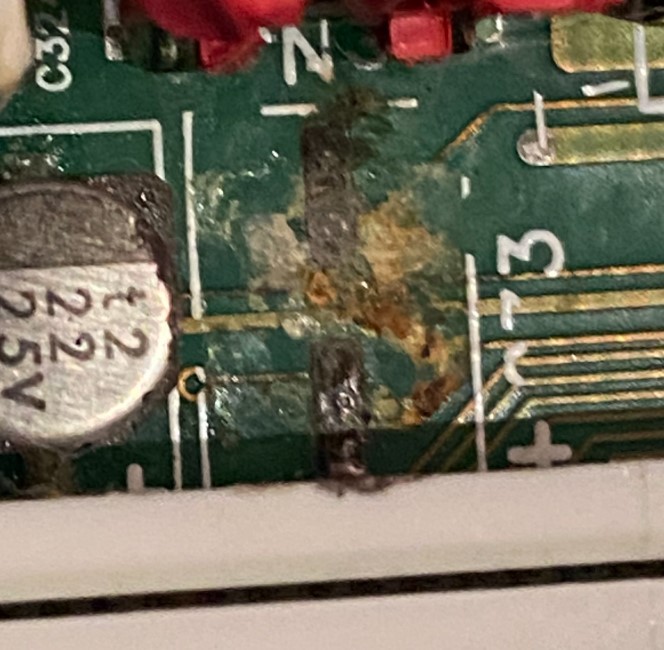
The impact on how the Amiga functions is a mere inconvenience compared to the physical damage leaking capacitors can cause. The leakage can contain polychlorinated biphenyls (PCBs), which are toxic and corrode the traces and components on the PCB, and affect the signal and performance of the circuit Leaking SMD capacitors should be removed and replaced as soon as possible to prevent further damage.
See the photos below of damaged caused by leaking caps.


The only way to prevent or fix these problems is to replace the capacitors. This is a delicate and complex task that requires soldering skills, proper tools, and replacement capacitors of the same or higher quality and specifications. The replacement capacitors should be either ceramic or tantalum, which are more stable and durable than electrolytic. The process of changing the capacitors involves:
- Opening the case of the Amiga, disconnecting the power supply and other cables.
- Removing the motherboard and any expansion cards from the case.
- Identifying and marking the locations and polarities of the capacitors on the motherboard and the expansion cards.
- Desoldering and removing the old capacitors, and cleaning the solder pads and any residue or corrosion.
- Soldering and installing the new capacitors, and checking the polarity and alignment.
- Reassembling the motherboard and the expansion cards, and testing the functionality of the computer.
Changing the SMD capacitors in the Amiga is a necessary and worthwhile procedure that can extend the life and performance of the computer.
Which Amigas use SMD capacitors?The Amiga models below use SMD capacitors which should be replaced.
- Amiga 600
- Amiga 1200
- Amiga 4000 / 4000T
- Amiga CD32
- Amiga CDTV remote
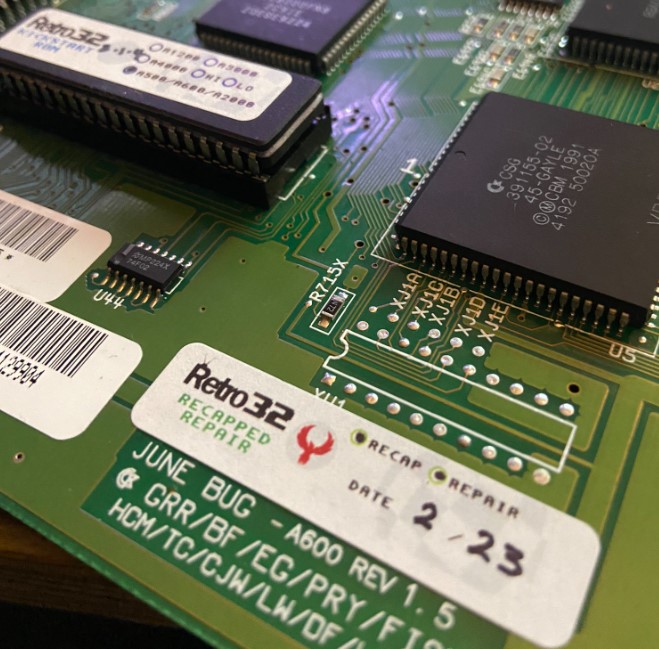
If you’re recapping your own Amiga it’s important that the board is clearly labeled to show when the machine was recapped.

The Amiga 500 and 500+ don’t suffer the same issues as the later machines. Commodore used through-hole capacitors which have proven to stand the test of time compared to the surface-mounted caps used in the later Amiga models.
The post Why it is important to change the capacitors in an Amiga appeared first on Retro32.
* This article was originally published here
Comments
Post a Comment